
The Torture Test for Your 3D Printer 💀

Think your 3D printer is perfectly calibrated? The torture test is here to prove it—or reveal its hidden weaknesses. It's not just a simple part, but a complete diagnostic in the form of a single print, designed to push your machine to its limits and evaluate every aspect of its performance. It's the essential tool for any maker who wants to master the art of 3D printing.
Want to test your printer? The torture test file is downloadable here: tjhoven74 via MakerWorld
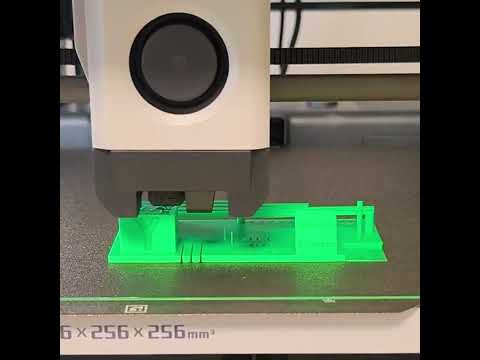
(Source 3D File: tjhoven74 via MakerWorld)
1. The Fundamental Tests
These tests are the most important, as they lay the foundation for all your prints.
- First Layer Test (Z Height) The first layer is the foundation of your print. A poorly calibrated Z-offset can cause peeling or poor quality.
- The test: The model features three zones at different heights (0.6 mm, 0.4 mm, and 0.2 mm).
- The diagnosis: Print the model and measure the actual height of each zone with calipers. If your measurements are consistently higher than expected, your nozzle is too far from the build plate. If they're lower, it's too close. Adjust the Z offset accordingly.
- Flow Test and Dimensional Accuracy This test is crucial to ensure your parts have the correct dimensions.
- The test: Print a simple 20 x 20 mm cube. The model can also include 1.8 mm diameter holes.
- The diagnosis: Measure the cube. If its dimensions are larger or smaller than 20 mm, your flow is poorly calibrated. Similarly, check that filament passes easily through the 1.8 mm holes. If it's too tight, you have over-extrusion. Adjust the flow parameter in your slicer.
2. Performance Tests
These tests evaluate your printer's ability to handle geometric and speed challenges.
- Retraction Test Retraction prevents the formation of unwanted plastic strands between two parts of a print.
- The test: Print a model with two towers and a series of cones.
- The diagnosis: If you see strings (stringing), it means your retraction settings (distance and speed) are not sufficient for your filament.
- Bridging and Cooling Test Bridging is the printing of filament suspended over a void. Its success depends on cooling and speed.
- The test: Print a model with a series of bridges of varying lengths. The overhang test is similar, with increasingly steep angles.
- The diagnosis: If bridges sag or overhangs are rough, it indicates a cooling problem. Increase fan speed and/or slightly reduce print speed for bridges.
3. Advanced Tests
These tests fine-tune surface quality and mechanical function.
- Belt Tension Test Loose belts can cause inaccuracies.
- The diagnosis: Observe the result on your precision cube. If the edges are wavy or if you see "ghosting" patterns (repetition of print patterns on the wall), your belt is likely loose and needs to be tightened.
- Line Width Test This verifies that the extruded filament width is correct.
- The diagnosis: Print a simple straight line and measure its width with calipers. The result should match the line width you set in your slicer.
- Surface Test This test evaluates the quality of the top and bottom layers of your print.
- The diagnosis: Observe the top of your cube. If there are holes or gaps, it may indicate under-extrusion. If there are bumps, it's over-extrusion.
By mastering these tests, you'll be able to diagnose nearly all printing issues and achieve consistent, reliable, and high-quality results.


