3D Print a Candy Dispenser 🍬
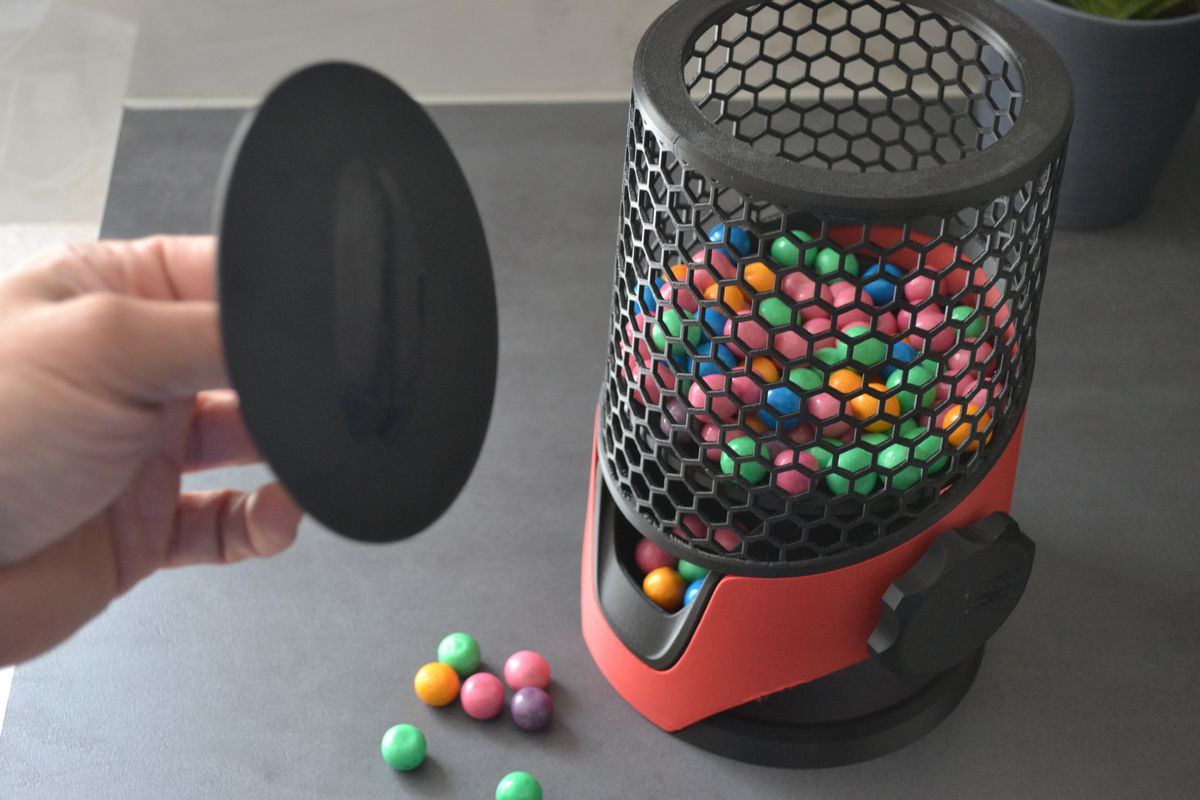
The candy dispenser is a highly popular 3D printing project within the maker community. It combines the satisfaction of creating a useful and playful object with the challenge of mastering mechanics to ensure smooth, jam-free operation. Whether manual (rotary) or motorized (with Arduino), 3D printing is at the heart of its design.

(Image and 3D File Source: EMAY-DESIGN via MakerWorld)
Different Types of Printable Dispensers
The distribution mechanism determines the complexity of printing:
- The Rotary Model (Manual Turning Wheel):
- Principle: The simplest option. A rotating wheel (the turning mechanism) with offset compartments is built into the base. When the user turns the handle, the compartments capture a set amount of candy and release it through a chute.
- Advantage: Entirely mechanical, requires no electronics or external components, aside from a few screws or a collection jar.
- The Motorized Model (Auger or Servo Motor):
- Principle: A mechanism is driven by a servo motor or stepper motor controlled by a board (often an Arduino Nano). Activation can be triggered by a push button, touch sensor, or even an infrared sensor.
- Advantage: Enables automatic distribution and more precise quantity control. Requires soldering and programming skills.
Critical Components and Technical Requirements
To ensure flawless operation, several 3D-printed parts are essential:
- The Mechanism (Wheel/Turner/Auger):
- Precision: These parts must be printed with very tight tolerances to ensure they rotate freely without excessive friction.
- Material: A rigid, smooth filament like PLA is often sufficient for this type of movement, but PETG offers better resistance to mechanical wear.
- The Housing and Container:
- The chassis and base must be sturdy. They often incorporate compartments for electronic components (if motorized) or screw holes for assembly.
- Using translucent filament (for the reservoir section) lets you see the candy level, adding visual appeal.
- The Jar/Lid: Many designs are engineered to reuse standard candy or food jars (for example, with an 11 cm diameter lid), which reduces printing time and cost.
Keys to Success for Smooth Assembly
To prevent your dispenser from jamming on first use, preparation is critical:
- Tolerance: Check the model's tolerances. Parts that interlock or rotate together need sufficient clearance (often $\mathbf{0.2 \text{ mm}}$) to prevent jamming.
- Finishing: Contact zones must be smooth. Light sanding or using a fine layer height may be needed for mechanism parts.
- Food Safety: Although PLA and PETG are technically non-toxic, regulations recommend avoiding prolonged food contact with 3D-printed plastic (due to layer porosity). To work around this, apply a food-safe varnish or resin to seal internal parts that contact candy.
- Assembly: For motorized models, it's recommended to program the Arduino board before screwing it into the housing, to simplify adjustments and testing.
Whether you're passionate about electronics or simply a fan of mechanics, 3D printing a candy dispenser is a fun and rewarding project that will add a playful touch to your desk or kitchen.