Transform Your Skateboard Into a Snowskate With 3D Printing
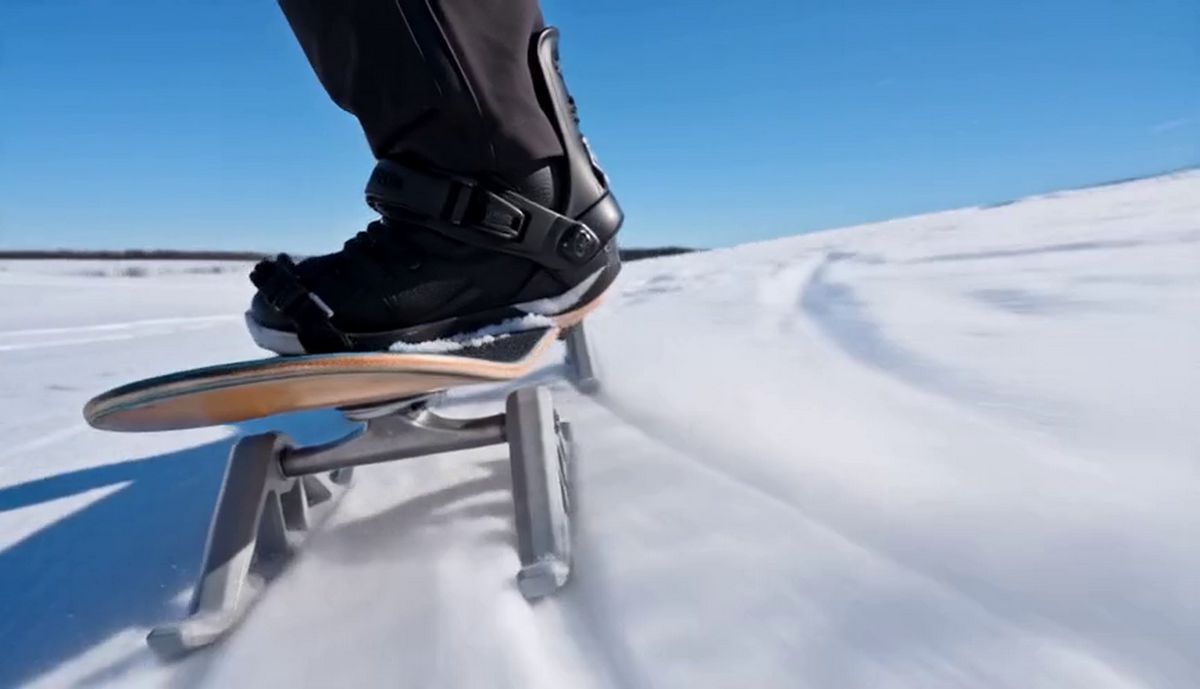
(Image Source and 3D File: Modular Mapping via MakerWorld)
Winter is here, snow is covering the sidewalks, and your skateboard is gathering dust in the corner of your room. Good news: thanks to the magic of 3D printing, the sliding season never ends. 3D-printable snowskate conversion kits have become one of the most popular DIY projects of the season, allowing you to instantly transform any classic board into a machine ready for the snow.
Here's everything you need to know to print and assemble your own kit.
✅ What Is a Snowskate Conversion Kit?
Instead of buying a complete snowskate, a conversion kit uses components you already own: your deck (the board) and your trucks (the axles). The principle is simple: you remove the four urethane wheels and replace them with four small skis (or pads) printed in 3D.
These pads aren't fixed rigidly. Most well-designed models use standard skate bearings at the axle, which allows each ski to pivot independently. This articulation is crucial: it allows the pads to conform to the snow's contours and absorb terrain irregularities, offering amazing control during turns.
✅ Materials You'll Need
The advantage of this project is that it requires very little external hardware. For the vast majority of models (such as those from ModularMapping3D or PEROs3D available online), you'll need:
-
Your current skateboard (with its trucks and axle nuts).
-
8 standard skate bearings (608 size). You can recover those from your current wheels, as you need 2 per ski to ensure proper load distribution on the printed plastic axle.
-
Approximately 500g to 1kg of filament.
✅ Print Settings and Filament Choice (Critical)
Don't launch this print with the first roll of PLA you have on hand. Cold and impacts are the worst enemies of 3D-printed plastic.
-
The right material: Forget standard PLA, which becomes brittle at temperatures below freezing and will shatter on the first impact. Definitely choose PETG or ASA. PETG offers excellent impact resistance and maintains good flexibility even in the cold.
-
Infill: Opt for a minimum of 30% to 40%. Use a solid three-dimensional pattern like Gyroid or Grid for optimal force distribution.
-
Walls (Perimeters): The strength of a printed part comes from its walls, not just its infill. Set your slicer to 3 or 4 walls/perimeters minimum.
-
Orientation: Print the pads on edge or according to the file creator's specific recommendations to prevent layers from delaminating under the rider's weight.
✅ Assembly and Installation
Installation takes less than five minutes before you head out to ride:
-
Press in the bearings: Insert two 608 bearings on each side of the central hub of each of the four printed pads. (Some designers include printed spacers to perfect alignment).
-
Disassemble: Unscrew the nuts on your trucks and remove your standard wheels.
-
Install the skis: Simply slide the printed pads onto your trucks' axles.
-
Secure: Replace the axle nuts and tighten. Leave just enough play for the pad to pivot freely front to back without rubbing.
It's a fun project, quick to set up, and guaranteed to turn heads on your local sledding hills. Just plan on adding some snow-appropriate grip (like foam or plastic studs) to your deck, as standard grip tape tends to turn into an ice rink once it's soaked with snow!