
Non-Planar 3D Printing on a Bambu Lab Printer

Non-planar 3D printing is a fascinating technique that lets you eliminate the "stairstepping" (aliasing) effect on curved surfaces by moving the nozzle along the Z-axis while it prints in X and Y.
On a Bambu Lab, it's absolutely possible, but it does require some preparation because the native software, Bambu Studio, doesn't yet natively support this feature.
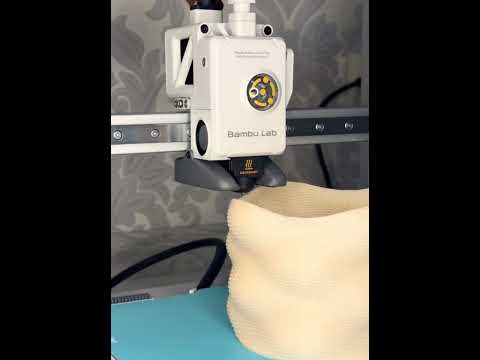
✅ The Concept: Why Switch to Non-Planar?
Traditionally, a printer deposits flat layers. On a gentle slope, this creates visible steps. Non-planar printing allows the nozzle to follow the curve of your part, delivering:
-
Flawless surface finish (no visible layer lines).
-
Increased strength because the plastic fibers follow the object's geometry.
✅ How to Do It on Bambu Lab?
Since Bambu Studio is based on PrusaSlicer but has limitations on experimental features, the most common approach is to use third-party software or scripts:
Option A: Use OrcaSlicer (Recommended)
OrcaSlicer is a very popular fork of Bambu Studio. It often integrates experimental features more quickly.
-
Install OrcaSlicer (it natively recognizes your Bambu Lab).
-
Look for the "Non-planar printing" option (often in experimental settings).
-
Heads up: You'll need to configure the tilt limits for your print head.
Option B: Post-Processing Script
Tools like the "Non-planar slicer" (a Python script) modify the G-code after standard slicing.
✅ Hardware Constraints (Critical!)
This is where it gets risky with a Bambu Lab. The print head is surrounded by a cooling duct and sensors.
-
Collision: If the nozzle descends to print a curve, the rest of the head (the plastic shroud) might hit parts already printed on your object.
-
Angle Limit: You're typically limited to slopes of 10° to 20° maximum. Beyond that, the Bambu head shroud will hit the part.
-
Extended Nozzle: Some users install longer nozzles (like E3D Revo nozzles with an adapter) to gain clearance between the head and part.
✅ Precautions to Take
-
Speed: Reduce print speed. Coordinated three-axis moves are more demanding on the motors.
-
Cooling: Make sure your cooling fan doesn't hit anything.
-
Leveling: Your build plate must be perfectly level—there's almost zero margin for error.
✅ Step-by-Step Guide to Test:
-
Choose a model with a smooth, domed top surface (like a mouse shell).
-
Use OrcaSlicer or a dedicated script.
-
Configure the "clearance angles" (print head clearance angles) in the software.
-
Watch the print closely to prevent the head from ripping your model off the build plate.


