Creating an Articulated Skeleton with 3D Printing
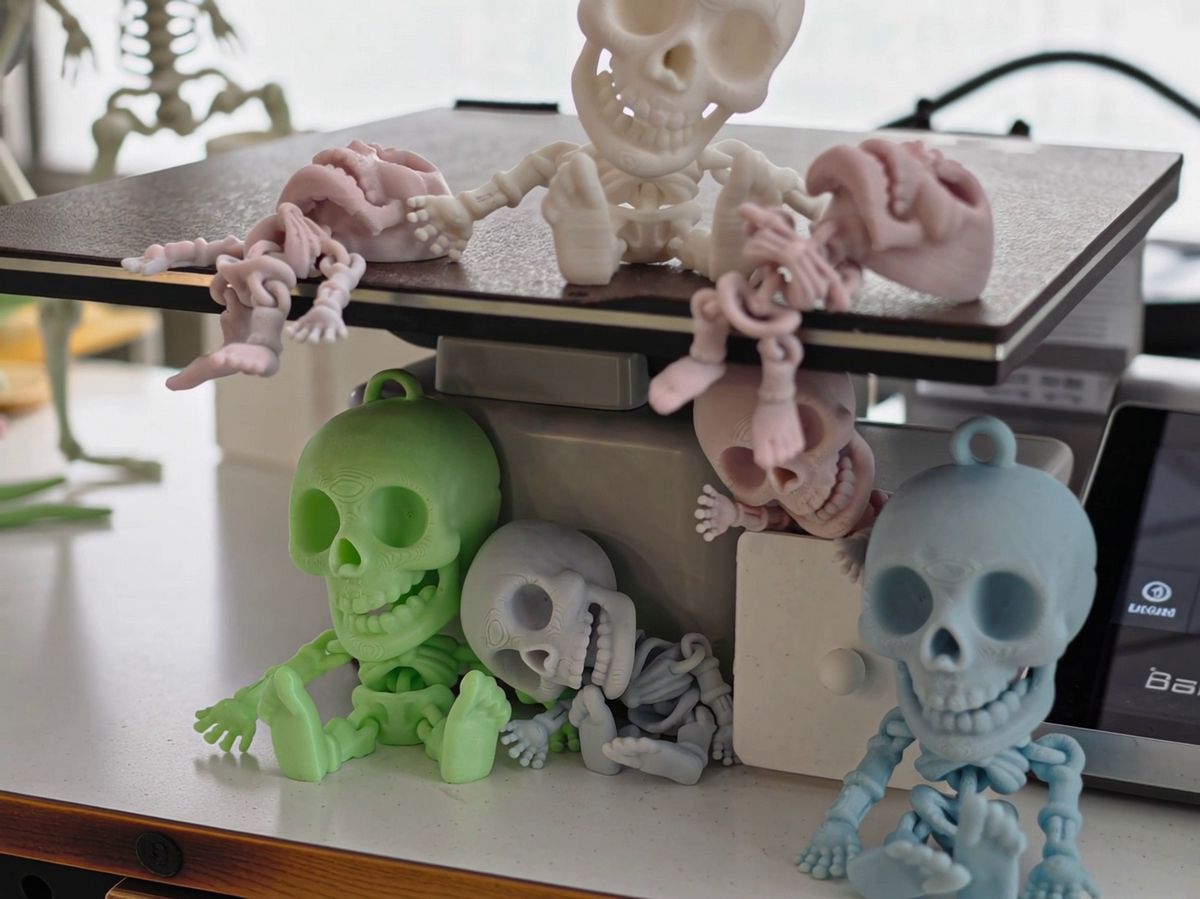
Once limited to fragile plastic kits or expensive anatomical models, the articulated skeleton has become an iconic and fascinating project for 3D printing makers. More than just a figurine, a 3D-printed skeleton is a technical feat that combines detailed modeling, printing precision, and ingenious joint engineering. Whether for Halloween, an educational project, or a unique collector's piece, it brings anatomy to life with stunning realism.

(Image and 3D File Source: 3D URSA via MakerWorld)
The Challenge of Anatomical Modeling
Realism is the key to a successful articulated skeleton. Every bone must be identifiable and functional.
- Anatomical Precision: 3D models available online (on Thingiverse, Printables, or Cults3D) are often based on real scans or highly detailed CAD models of human skeletons. This ensures that every vertebra, every skull bone, and every phalanx has the correct shape and proportions.
- Modular Design: The human skeleton is made up of 206 bones! It's therefore essential to divide the model into many small pieces (skull, jaw, individual vertebrae, ribs, humerus, femur, etc.) to make printing and assembly easier.
Articulation Systems: Bringing Movement to Life
The heart of the project is the skeleton's ability to strike dynamic poses. Several approaches are possible for the joints:
A. Print-in-Place Assembly
- Principle: Some skeleton parts (like vertebrae or small finger joints) are modeled with a small clearance between pieces, so they print already connected but not fused. After printing, a slight movement is enough to "free" the joint.
- Advantages: No manual assembly, ideal for complex small joints.
- Challenges: Requires a very well-calibrated printer and filament free of stringing to prevent layers from sticking together.
B. Socket and Pin Articulations
- Principle: Bones are printed separately, then pins (often 3D-printed, or simply cut pieces of filament) are inserted into holes to create pivot points (elbows, knees, shoulders).
- Advantages: More robust, easier to repair. Allows for more precise poses.
- Challenges: Requires sometimes meticulous post-printing assembly.
C. Internal Cabling (Advanced Method)
- Principle: For large skeletons (life-size or near life-size), bones are printed with internal channels through which strong elastic wires (like reinforced fishing line or fine elastics) are threaded. These wires pass through different bone pieces and are tensioned at the ends, holding the assembly together.
- Advantages: Creates a highly flexible and realistic skeleton, capable of "hanging" naturally.
- Challenges: Modeling the channels and tensioning the wires require expertise.
Materials and Post-Processing: The "Bone" Look
Filament choice and finishing are essential for realism.
- PLA: The most common material for its ease of printing.
- Color: Opaque white PLA or bone/cream-colored PLA is perfect.
- Texture: Marble PLA can provide a slightly grainy texture that mimics bone surface well.
- Sanding and Aging: Light sanding can smooth the joints. For an aged effect, a wash of diluted acrylic paint (light brown or raw sienna) can be applied and wiped away, leaving pigment in the recesses and giving an antique patina.
- Adding Weight: For large skeletons, inserting metal inserts in the femurs or pelvis can provide better stability.
A 3D-printed articulated skeleton is not merely a decorative piece; it's an exploration of form, movement, and additive manufacturing's unique ability to recreate the complexity of the human body.